Email Authentications (DKIM, SPF, DMARC) can only be added to domains you or your business ownership and control. To authenticate your domain, you'll need to copy DNS records from MailExpress and paste them into your domain's DNS records. The steps may vary depending on your domain provider. If you do not know where your domain is managed, reach out to the person or team that manages your website or email address for help.
First, go to the Settings tab -> Send Configuration, click on the three dots next to your domain and select Authenticate Domain to find the DNS settings. If your domain provider isn't listed above, log in to your provider's site, search their help documents, or contact their customer support team.
GoDaddy
Login your account -> Go to Domains -> Manage DNS -> DNS Records -> Add
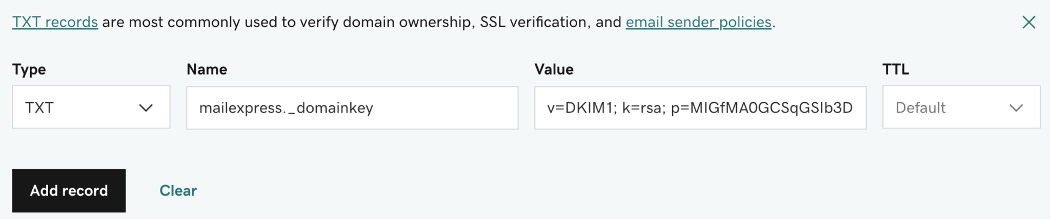
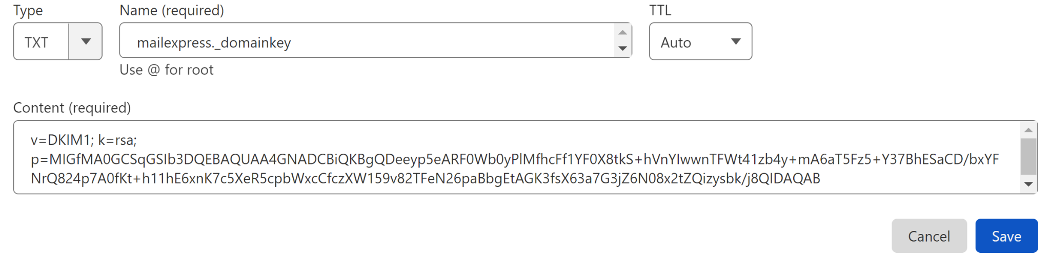
TXT (DKIM) record
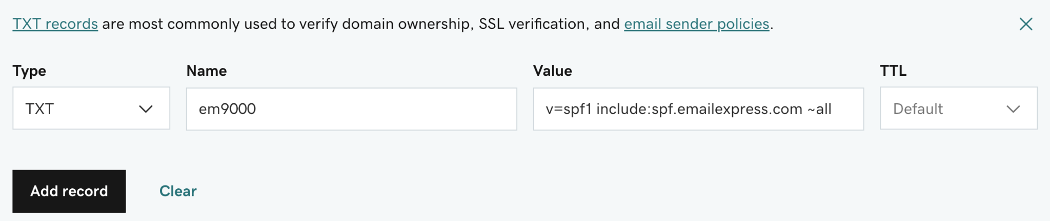
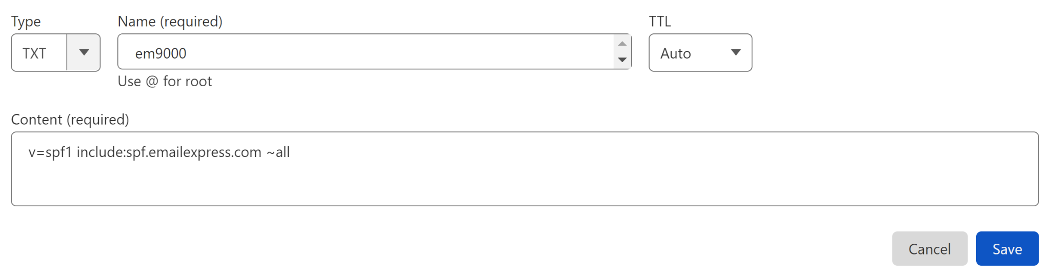
TXT (SPF) record
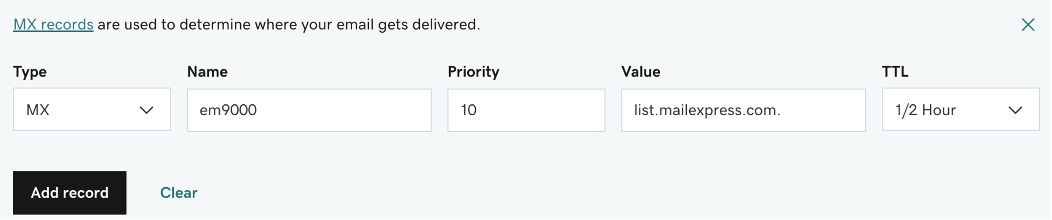
MX (Mail Exchanger) record
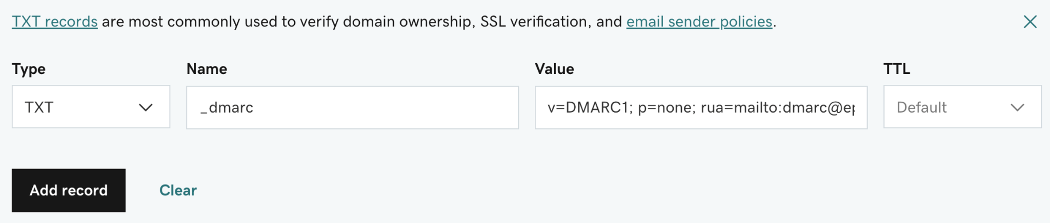
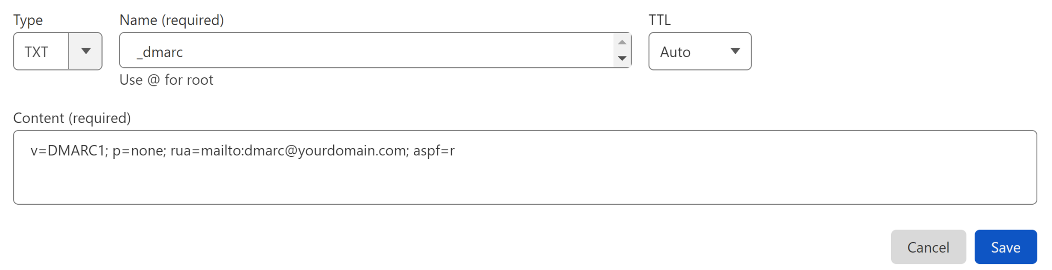
TXT (DMARC) record (optional)
Cloudflare
Login your account -> Go to DNS Settings -> Add record
TXT (DKIM) record
TXT (SPF) record
MX (Mail Exchanger) record

TXT (DMARC) record (optional)
Bluehost
Login your account -> go to Domains -> DNS Manager -> Find the corresponding record type
TXT (DKIM) record

TXT (SPF) record

MX (Mail Exchanger) record

TXT (DMARC) record (optional)

Google Domains
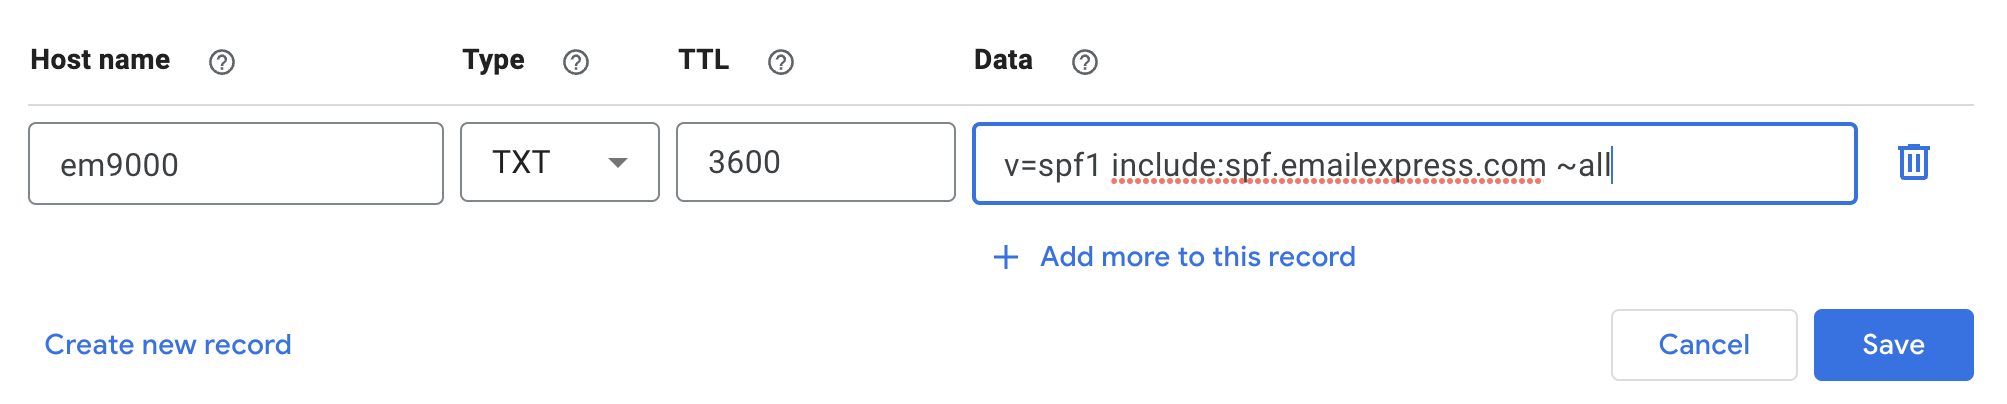
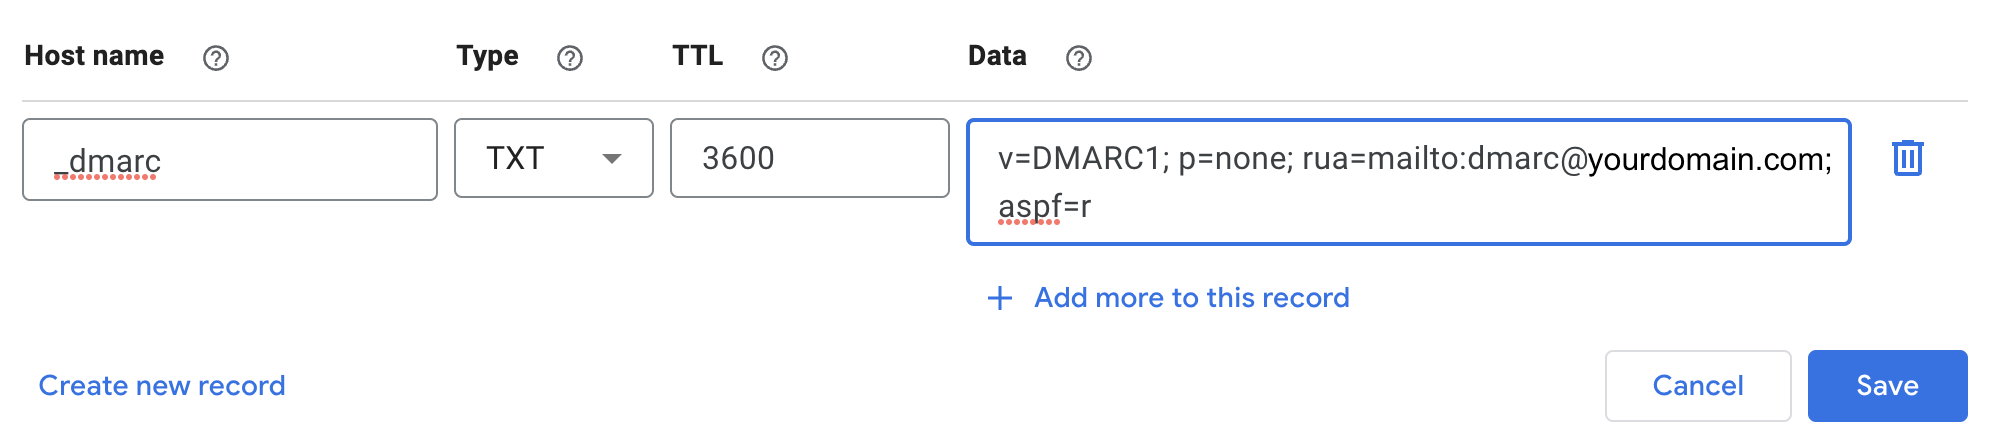
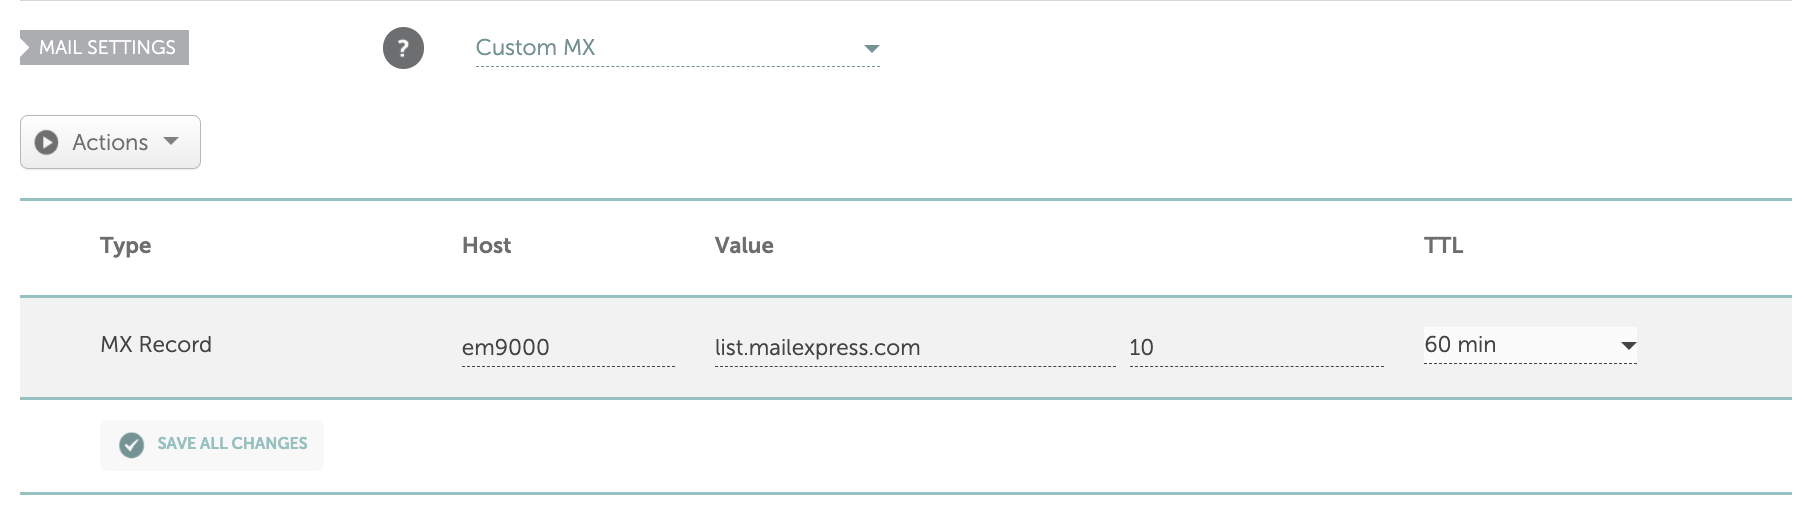
Login to your account -> Go to DNS -> Create new record
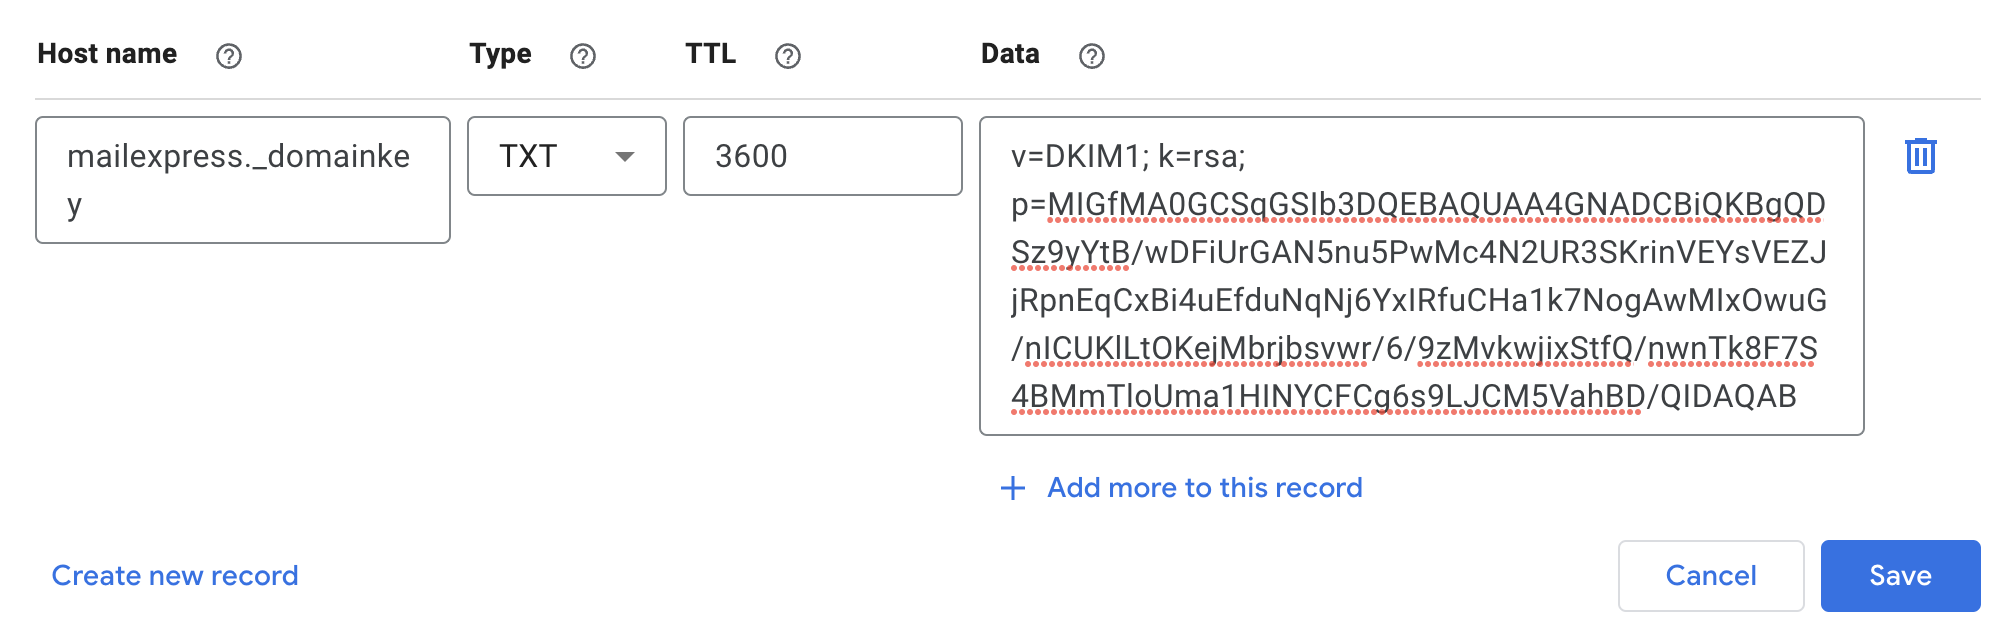
TXT (DKIM) record
TXT (SPF) record
MX (Mail Exchanger) record

TXT (DMARC) record (optional)
Namecheap
Login your account -> Domain List -> Advanced DNS -> Add new record
TXT (DKIM) record

TXT (SPF) record

MX (Mail Exchanger) record
TXT (DMARC) record (optional)
